My eleven year old daughter recently asked me ’the question’. You know the one…
“Hey dadda, what’s Kubernetes?” 🔗
How do you explain kubernetes to an eleven year old?! Check out this video to learn how. Brilliant.
I am not a Kubernetes expert. I am learning, probably just like you are. Creating resources, tearing down resources, building them again, kubectl-ing, scratching my head, scratching my head some more, rinse and repeat. I can understand how powerful it is. I can also understand how complex it is.
As an engineer, I am constantly trying to distill complex things down to their simplest form. I figure out how to do something by reading documentation, blogs, dissecting code, and a humorous amount of trial and error. If I don’t distill this information and document it, I’ll have to do it all over again in a few months as my memory is just awful. I do enjoy this process, and I hope these types of posts can help you get to where you are going a tiny bit faster.
If you want to deploy or demonstrate dymamically provisioned, persistent storage without being a Kubernetes expert, this is the post for you. 🔗
Let’s start with some basic definitions:
- Kubernetes; container orchestration system
- Azure Kubernetes Service (AKS); a fully managed Kubernetes cluster service provided by Microsoft
- NetApp Trident; dynamic, persistent, storage orchestrator for Kubernetes (or Docker)
- Azure NetApp Files; lightning fast, enterprise grade, file storage service (NFS/SMB) provided by Microsoft
At the end of this tutorial you will have deployed AKS, installed NetApp Trident, configured a Trident backend to dynamically provision Azure NetApp Files volumes, and have a running nginx deployment being served by Azure NetApp Files storage.
Before we dive in… You will need a Linux operating system to interact with Trident (tridentctl). I am using an Ubuntu VM running in Azure. You could use the Windows Subsystem for Linux or any Linux distro on the supported host operating systems list found here.
Ok, let’s dive in!
Deploy your Kubernetes cluster using the Azure Kubernetes Service (AKS) 🔗
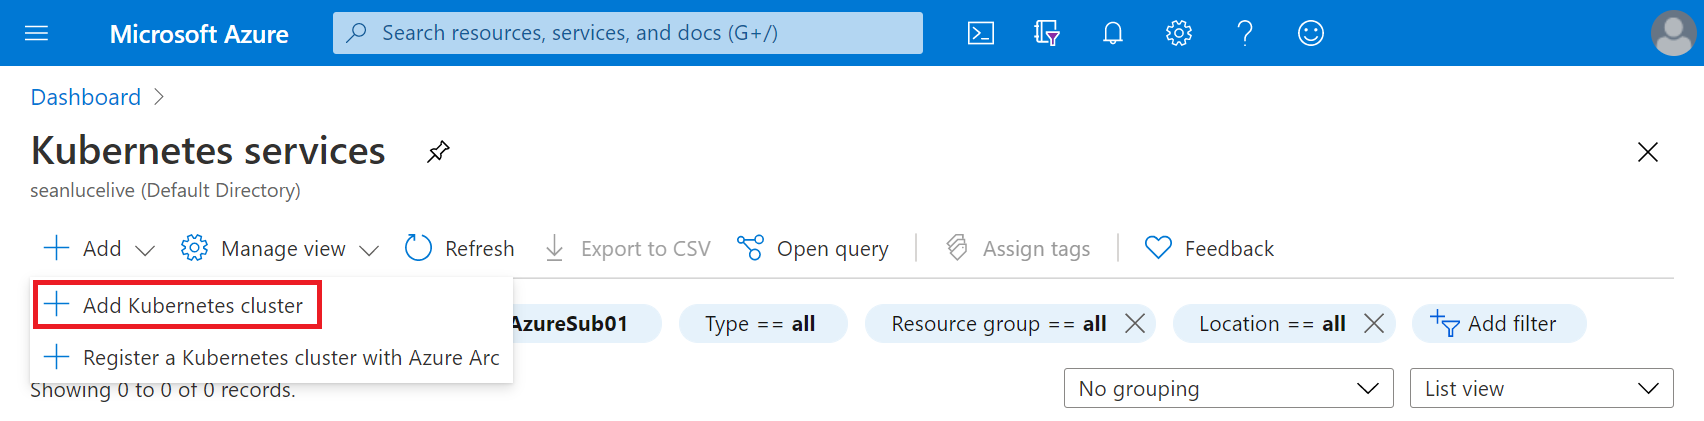
- From within the Azure portal, navigate to ‘Kubernetes services’ and click the ‘+Add’ button at the top, choose ‘Add Kubernetes cluster’.
- You can accept the default settings for everything. You will need to provide the resource group and give your cluster a name. Feel free to reduce the number of nodes and node size to save yourself some money. A single node is enough for this demo. AKS will create all of the required Azure networking components for you.
Create a delegated subnet for Azure NetApp Files 🔗
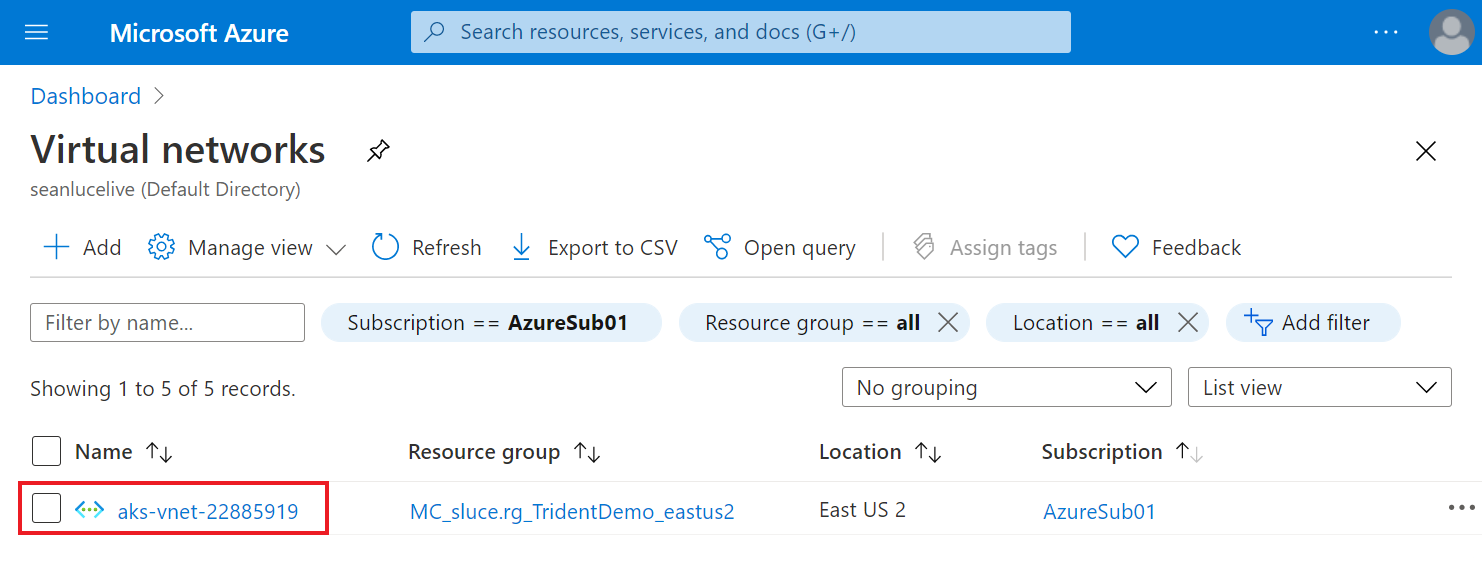
- Navigate to ‘Virtual networks’ within the Azure portal. Find your newly created virtual network. It should have a prefix similiar to ‘aks-vnet’. Click on the name of the VNet.
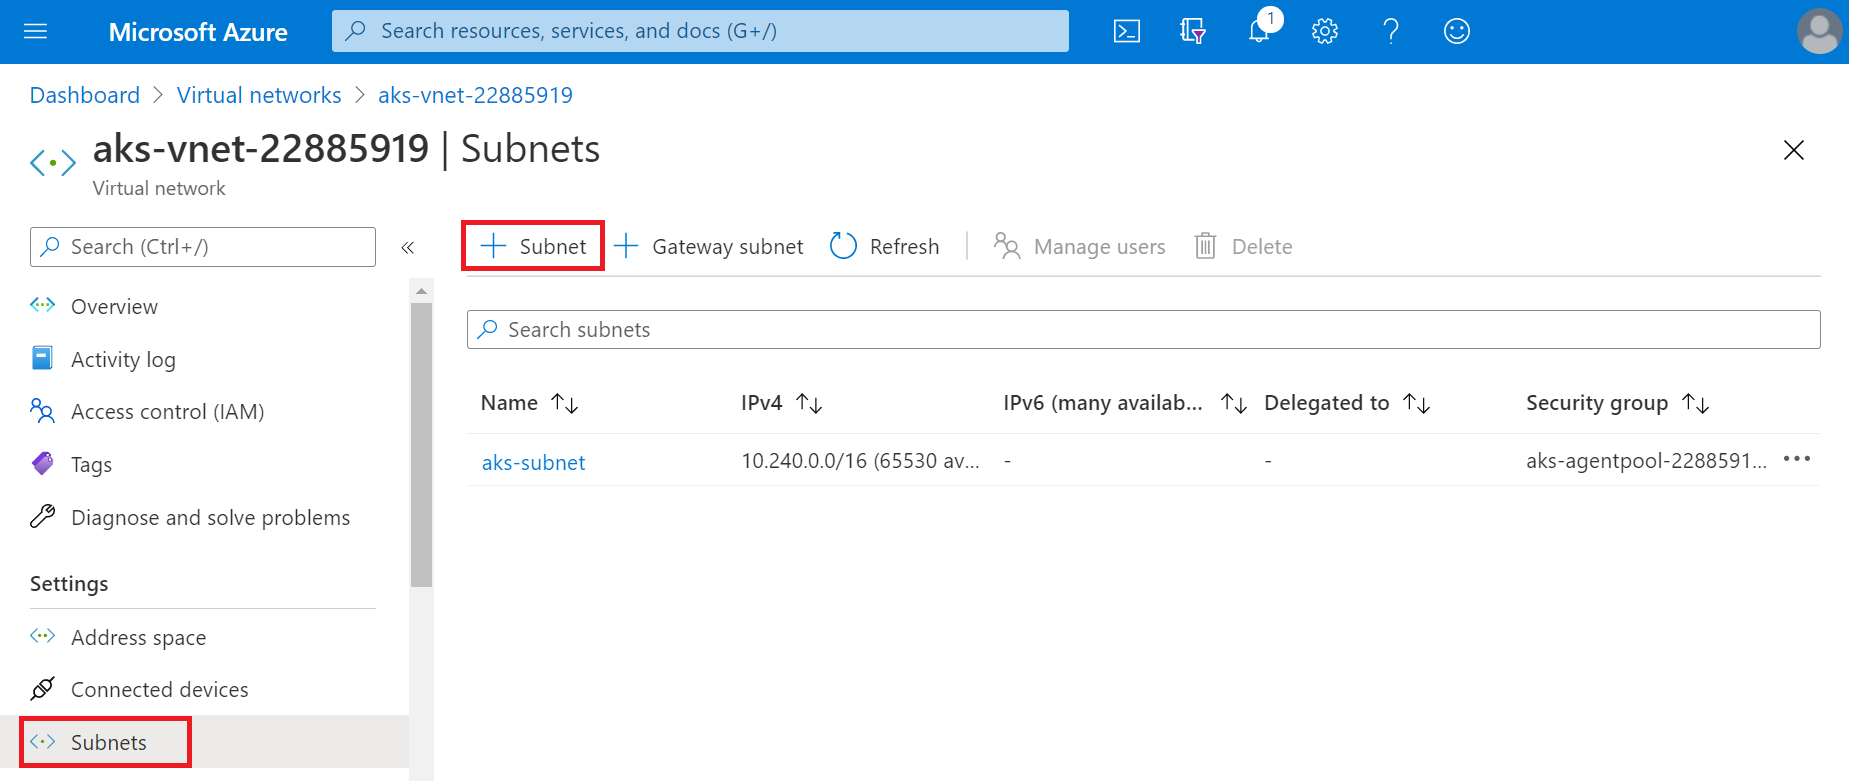
- Click on ‘Subnets’ and select ‘+Subnet’ from the top toolbar.
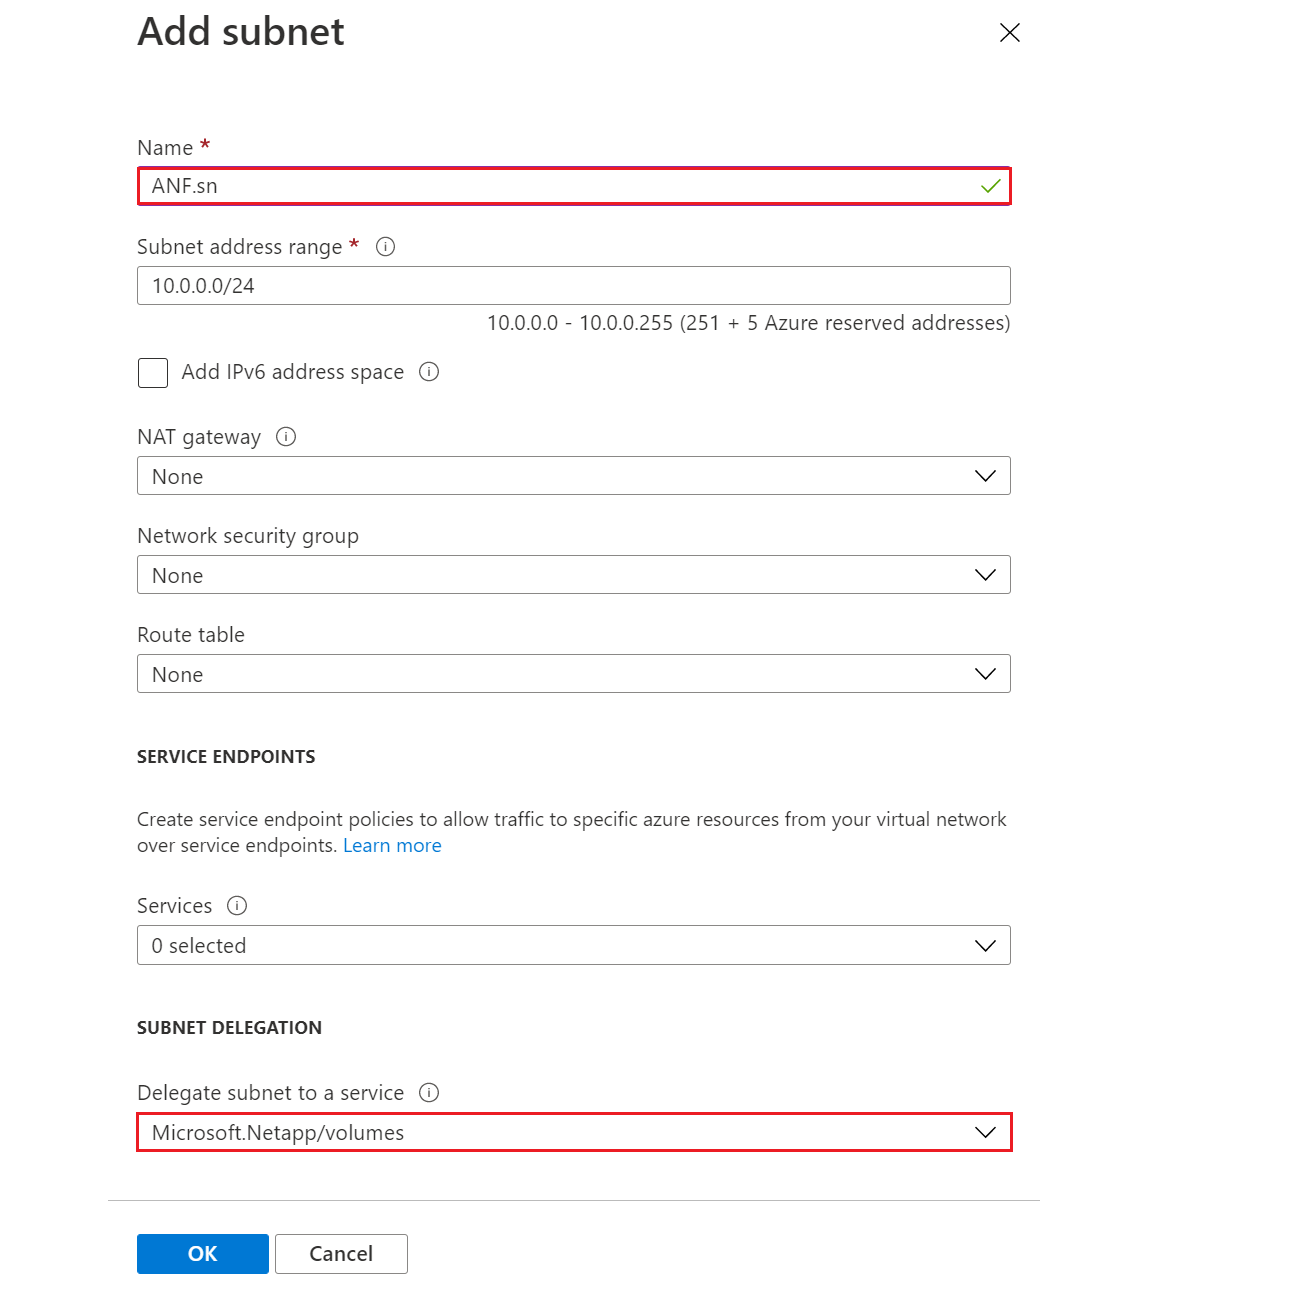
- Give your subnet a name like ‘ANF.sn’ and under the ‘Subnet delegation’ heading, select ‘Microsoft.Netapp/volumes’. Do not change anything else. Click ‘OK’.
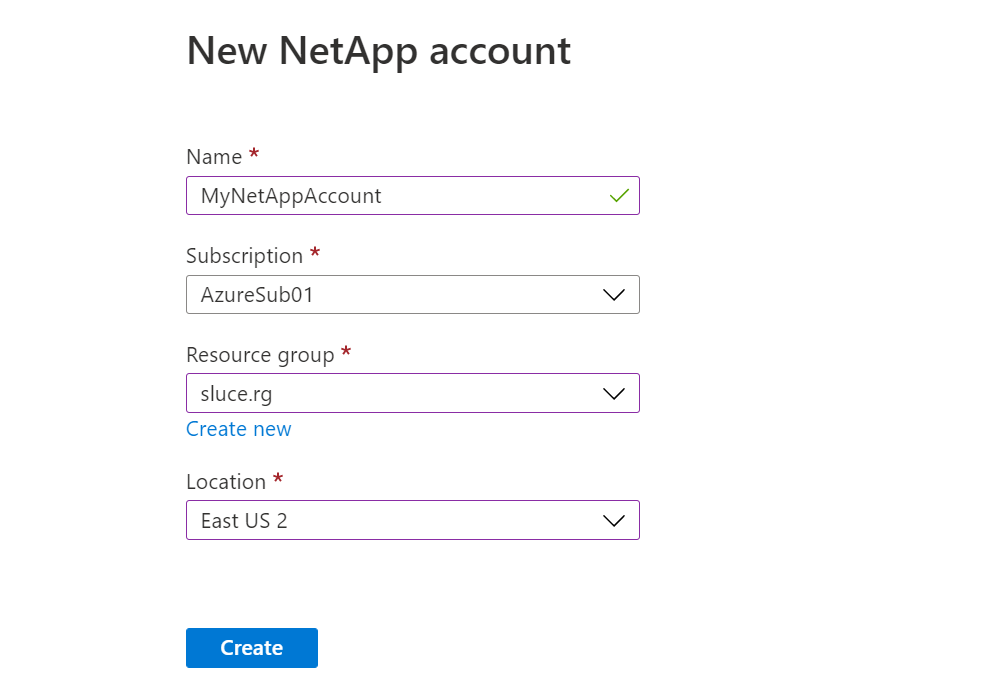
Create a new NetApp account within the Azure NetApp Files Service 🔗
- Navigate to the Azure NetApp Files service, click on the ‘+Add’ button.

- Give your account a name, choose a resource group. IMPORTANT: For the location, choose the same region as your AKS cluster. Click the ‘Create’ button.
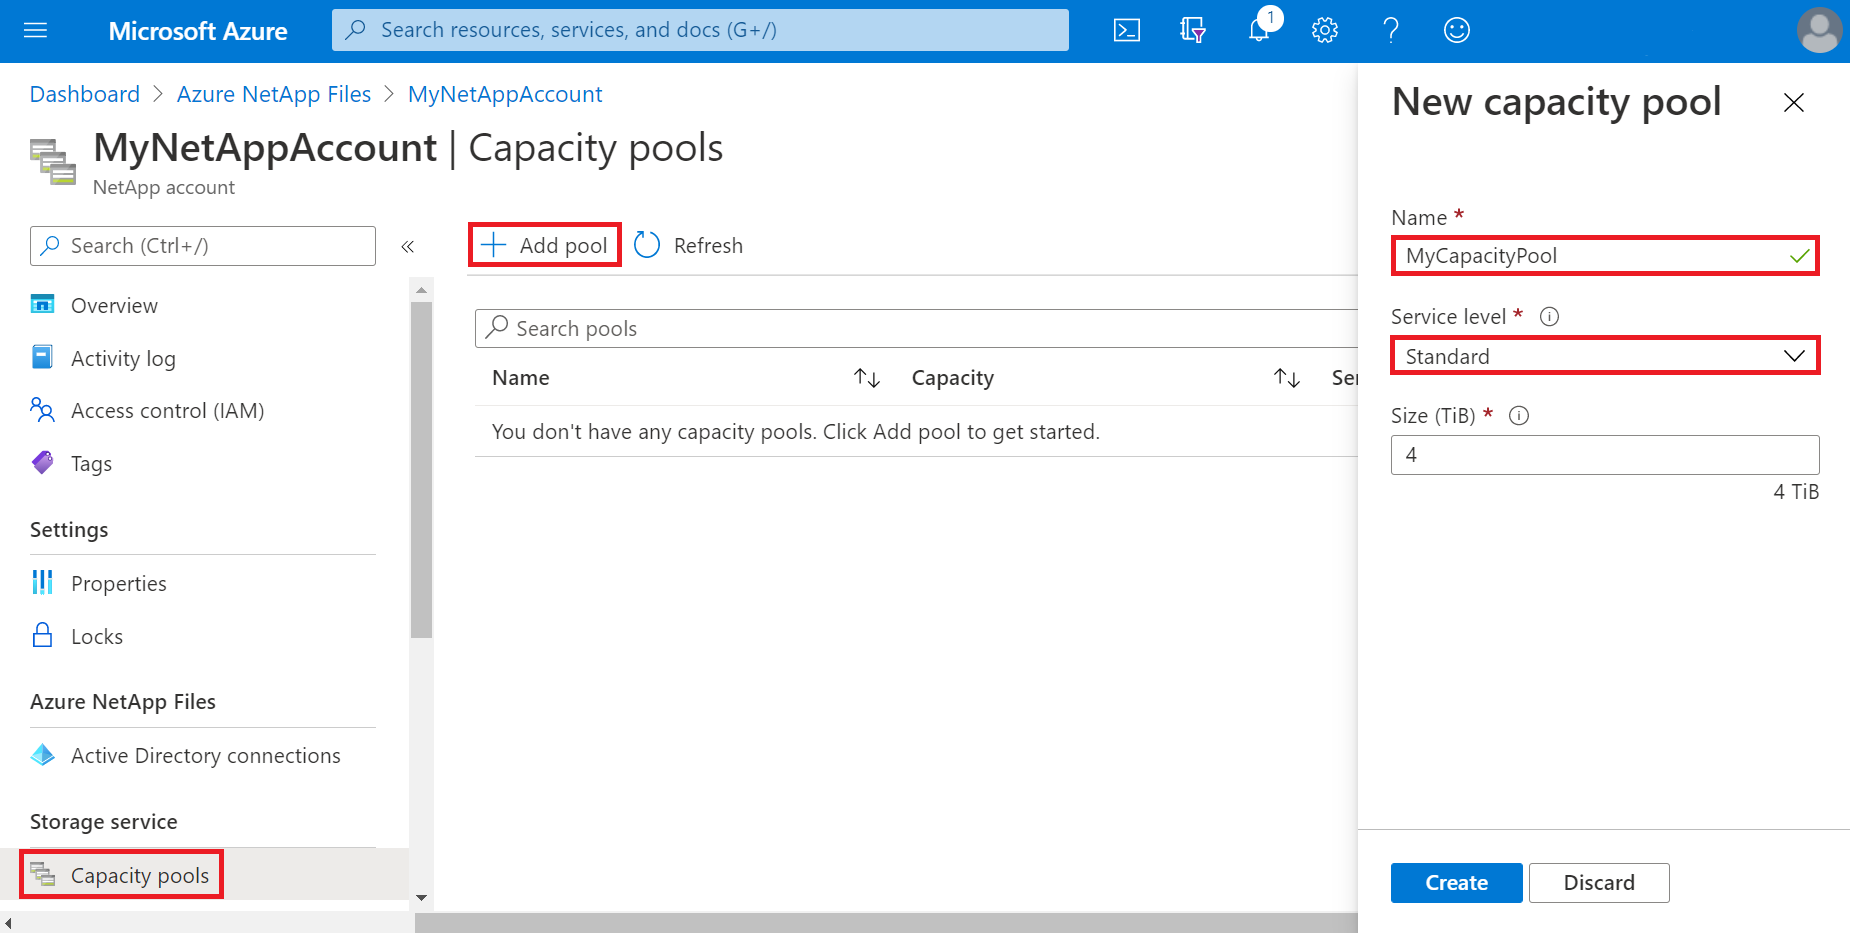
Create a Azure NetApp Files Capacity Pool 🔗
- Navigate to your NetApp account, click on ‘Capacity pools’, click ‘+Add pool’, give it a name, choose ‘Standard’ for the service level, leave the QoS type as Auto. Click ‘Create’.
Install ‘kubectl’ and the Azure CLI on your Ubuntu VM (or WSL) 🔗
sudo snap install kubectl --classiccurl -sL https://aka.ms/InstallAzureCLIDeb | sudo bashLogin to your Azure account using Azure CLI
az login
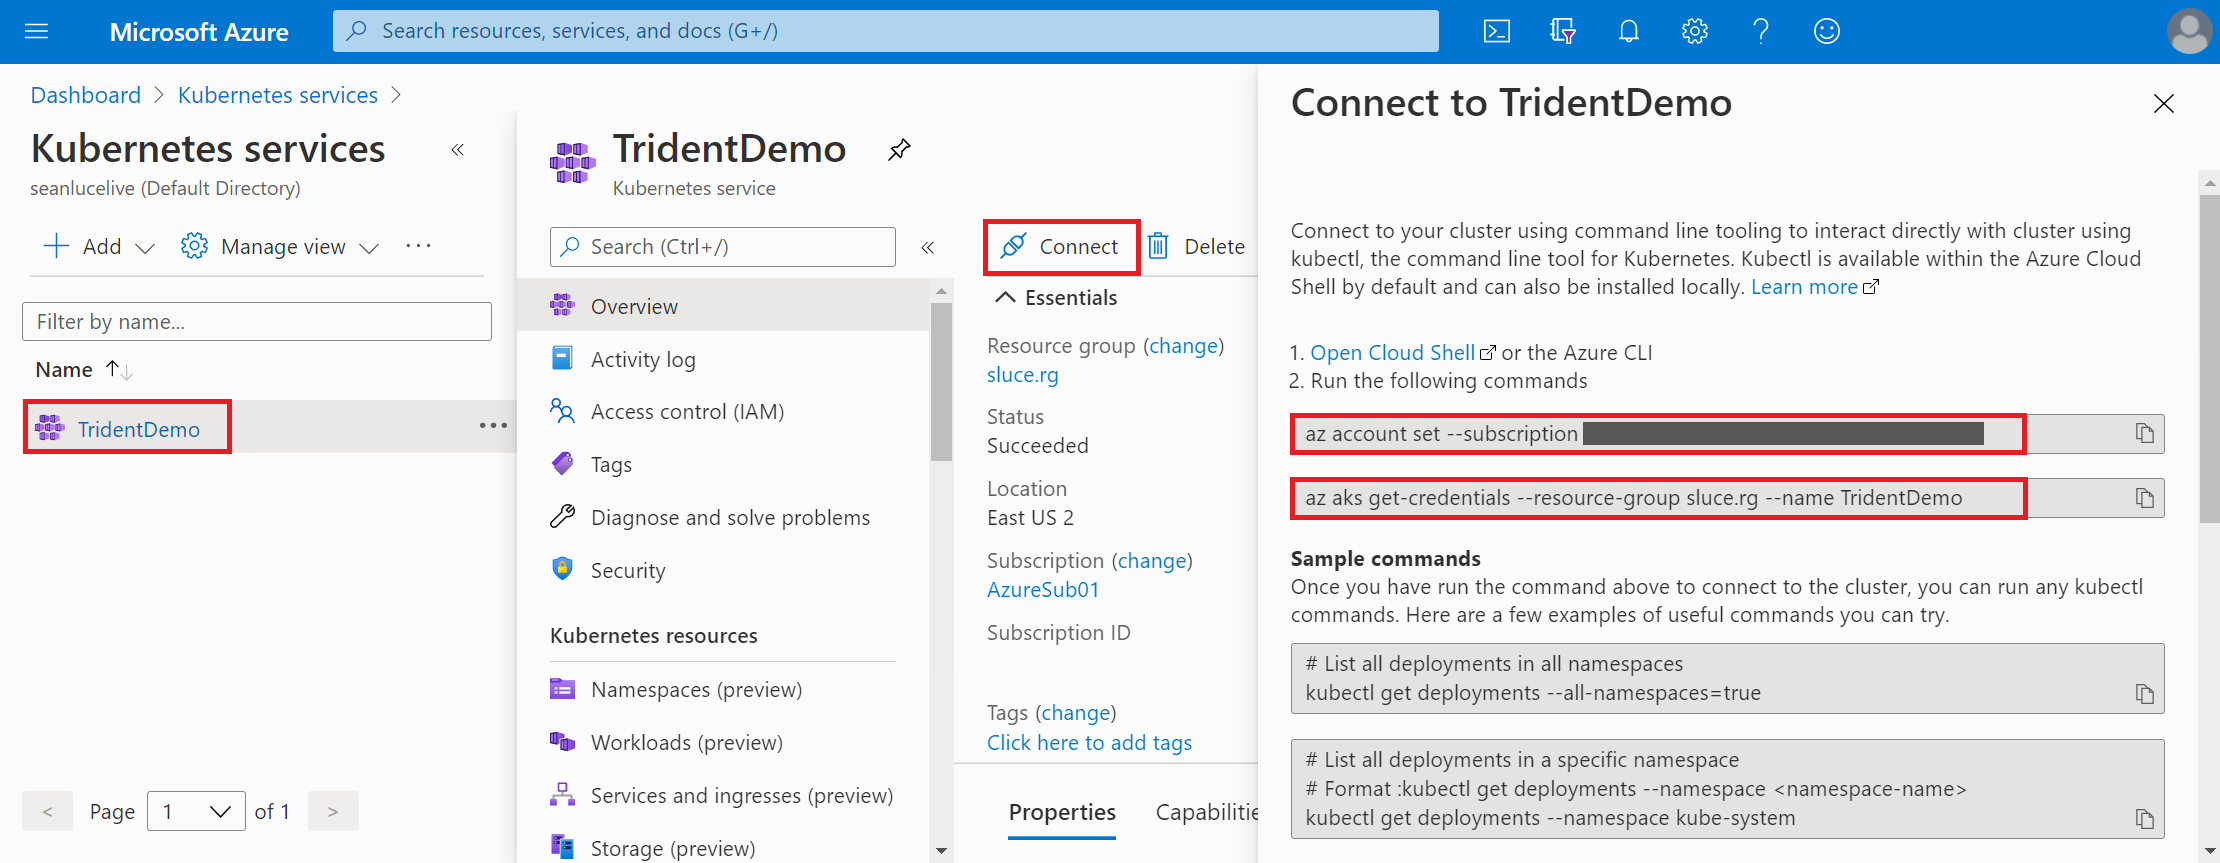
Connect to your Kubernetes cluster 🔗
From within the Azure portal, navigate to your Kubernetes cluster and click the ‘Connect’ button, execute the ‘az account set…’ and ‘az aks get-credentials…’ commands from your Linux terminal.
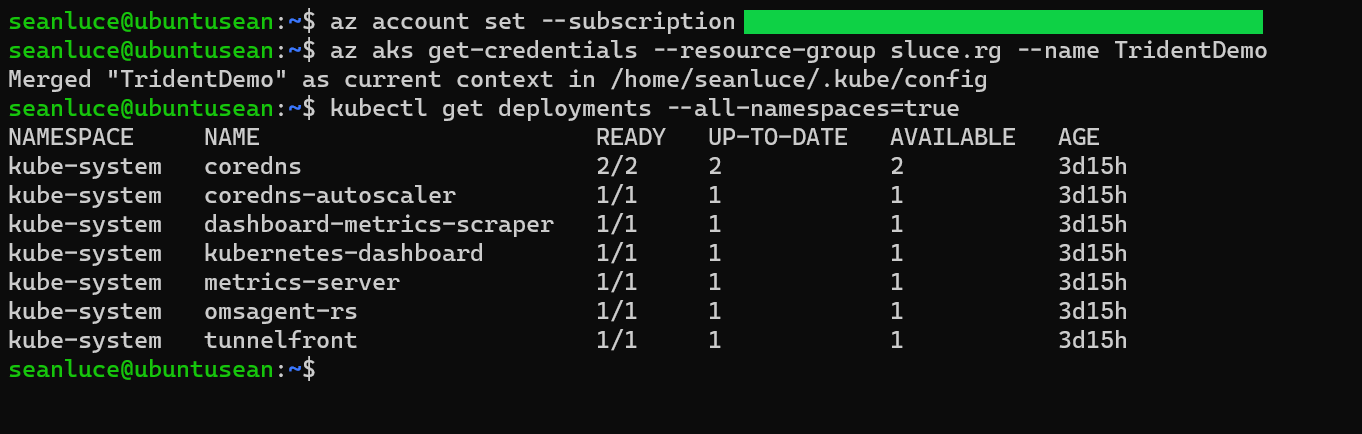
Verify you are connected to your Kubernetes cluster
kubectl get deployments --all-namespaces=trueIt should look something like this:
Install Trident using the ‘Trident Operator’ method 🔗
I encourage you to go read the official documentation here. I have summarized the commands below.
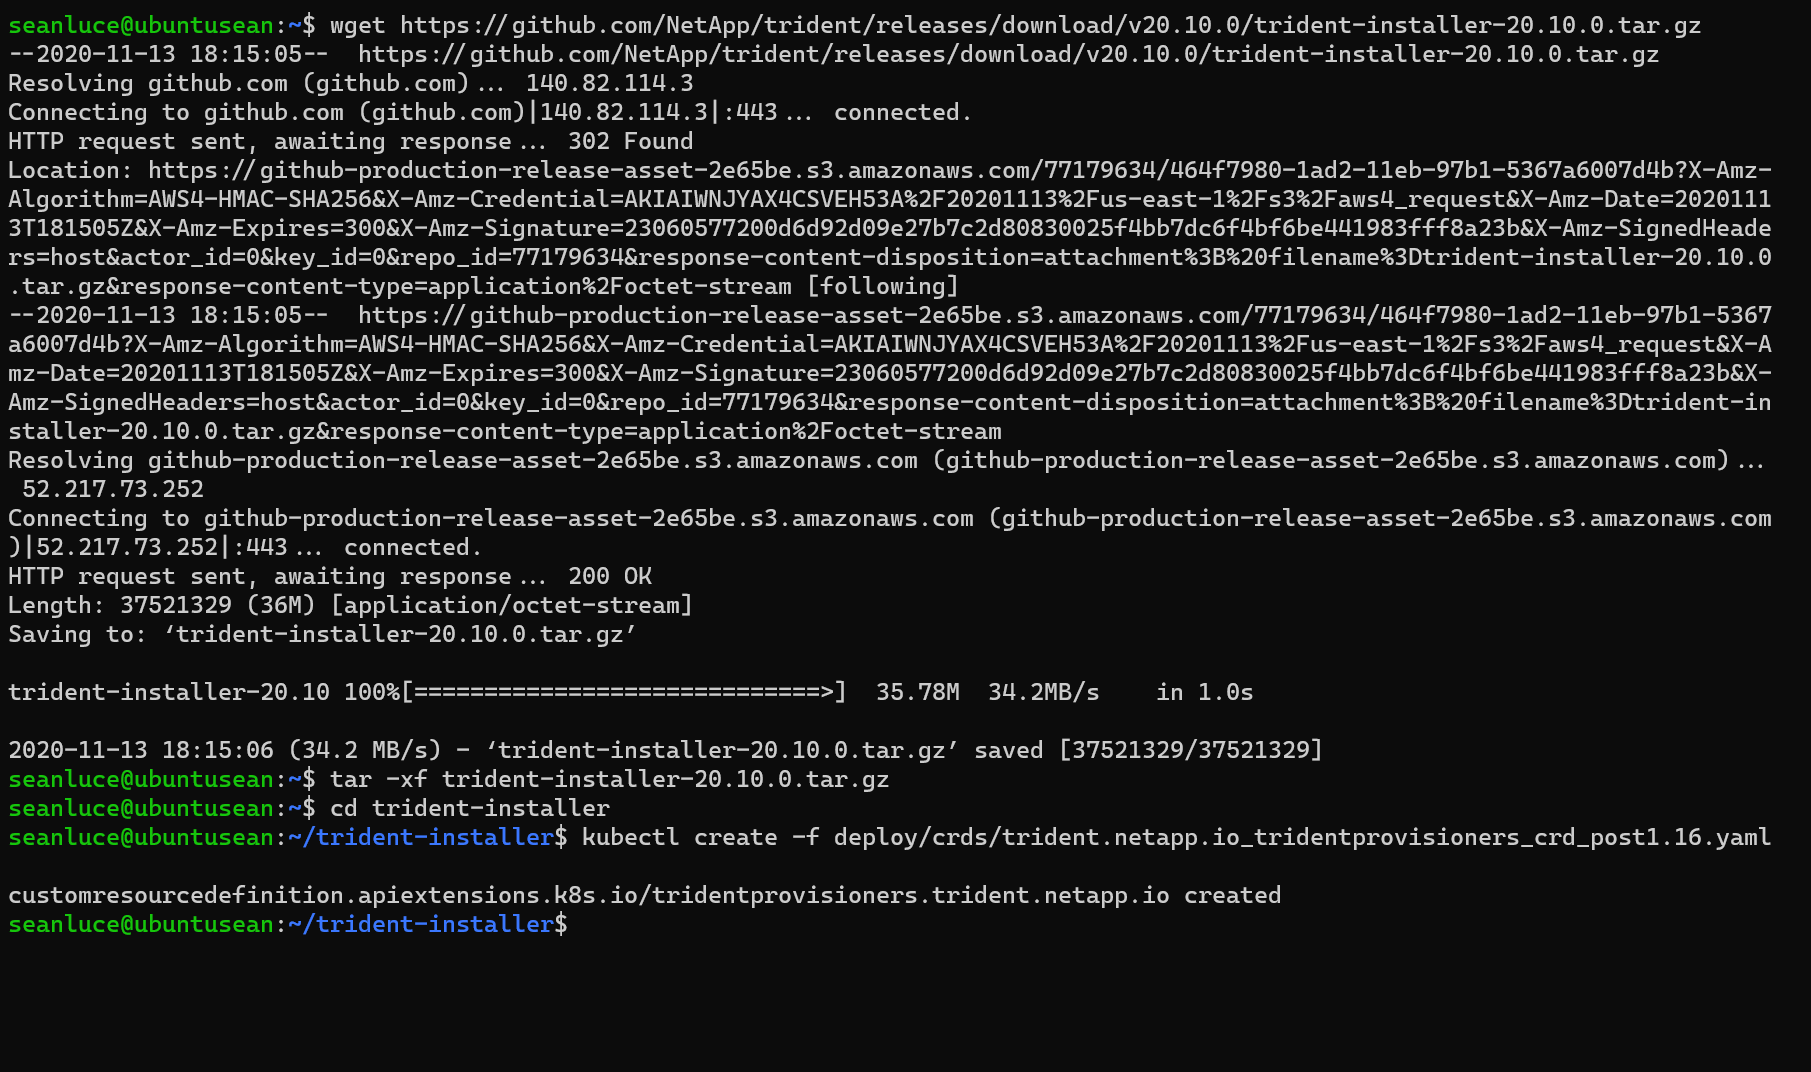
Download the Trident installer bundle
wget https://github.com/NetApp/trident/releases/download/v20.10.0/trident-installer-20.10.0.tar.gzExtract the bundle
tar -xf trident-installer-20.10.0.tar.gzChange directory to the trident-installer
cd trident-installerDeploy the TridentProvisioner Custom Resource Definition (CRD)
kubectl create -f deploy/crds/trident.netapp.io_tridentprovisioners_crd_post1.16.yamlIt should look like this so far:
Create the Trident namespace
kubectl apply -f deploy/namespace.yaml
Deploy the Trident operator to the default ’trident’ namespace
kubectl apply -f deploy/bundle.yaml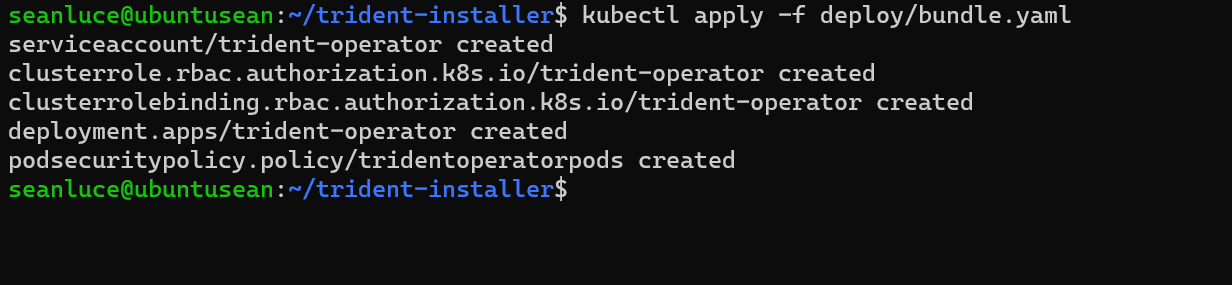
Confirm the Trident operator is installed and running
kubectl get deployment -n trident
kubectl get pod -n trident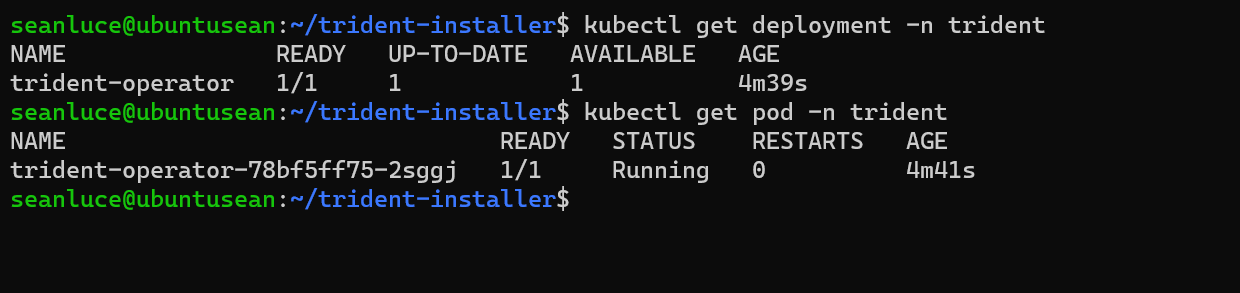
Create the TridentProvisioner Custom Resource (CR) to install Trident
kubectl create -f deploy/crds/tridentprovisioner_cr.yaml
Finally, copy ’tridentctl’ to a directory in your $PATH (i.e., ‘/usr/local/bin’)
sudo cp ./tridentctl /usr/local/bin
Clone my ‘ANF_Trident_AKS’ GitHub Repository 🔗
This repo has some boiler plate code that we will modify to demostrate Trident in your AKS environment.
From your Linux workstation, go back to your home directory
cd ~Clone the ‘ANF_Trident_AKS’ Repository and change directory to ‘ANF_Trident_AKS’
git clone https://github.com/seanluce/ANF_Trident_AKS.git
cd ANF_Trident_AKS
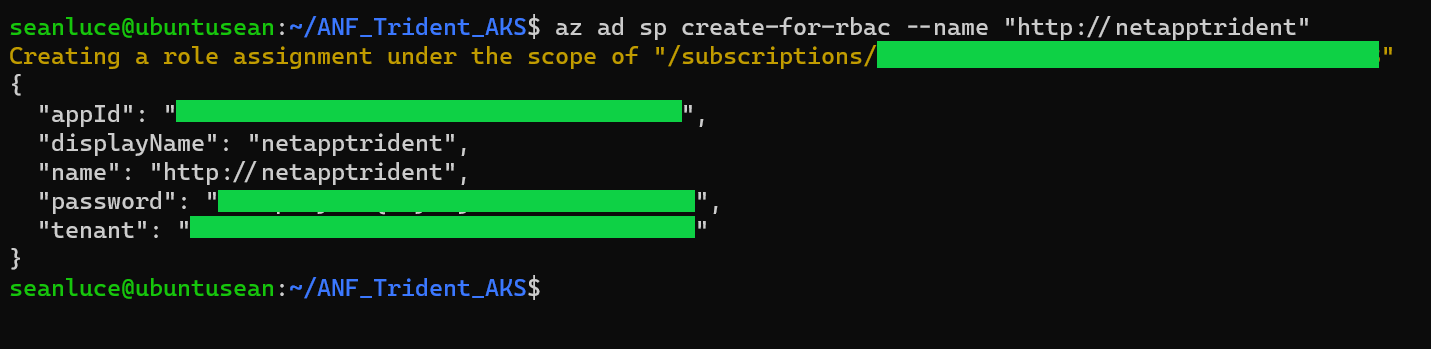
Create an Azure Service Principal 🔗
The service principal is how Trident communicates with Azure to manipulate your Azure NetApp Files resources.
az ad sp create-for-rbac --name "http://netapptrident"The output should look like this:
Create your Trident backend for Azure NetApp Files 🔗
Using your preferred text editor, complete the following fields inside the ‘anf_backend.json’ file:
- subscriptionID: your Azure Subscription ID
- tenantID: your Azure Tenant ID (from the output of ‘az ad sp’ in the previous step)
- clientID: your appID (from the output of ‘az ad sp’ in the previous step)
- clientSecret: your ‘password’ (from the output of ‘az ad sp’ in the previous step)
- location: the location of your Azure NetApp Files capacity pool
- serviceLevel: the service level of your Azure NetApp Files capacity pool
- virtualNetwork: the virtual network that was created by AKS
- subnet: the Azure NetApp Files delegated subnet
The file should look similiar to this:
{
   "version": 1,
   "storageDriverName": "azure-netapp-files",
   "subscriptionID": "11111111-1111-1111-1111-111111111111",
   "tenantID": "22222222-2222-2222-2222-222222222222",
   "clientID": "33333333-3333-3333-3333-333333333333",
   "clientSecret": "44444444-4444-4444-4444-444444444444",
   "location": "eastus2",
   "serviceLevel": "Standard",
   "virtualNetwork": "aks-vnet-22885919",
   "subnet": "ANF.sn",
   "nfsMountOptions": "vers=3,proto=tcp,timeo=600",
   "limitVolumeSize": "500Gi",
   "defaults": {
      "exportRule": "0.0.0.0/0",
      "size": "200Gi"
   }
}
Instruct Trident to create the ANF backend in the ’trident’ namespace
tridentctl -n trident create backend -f anf_backend.json
Create a Kubernetes storage class 🔗
Instruct Kubernetes to create a storage class that will reference our Trident backend
kubectl apply -f anf_sc.yaml
Create a Kubernetes persistent volume claim (PVC) 🔗
Instruct Kubernetes to create a persistent volume claim
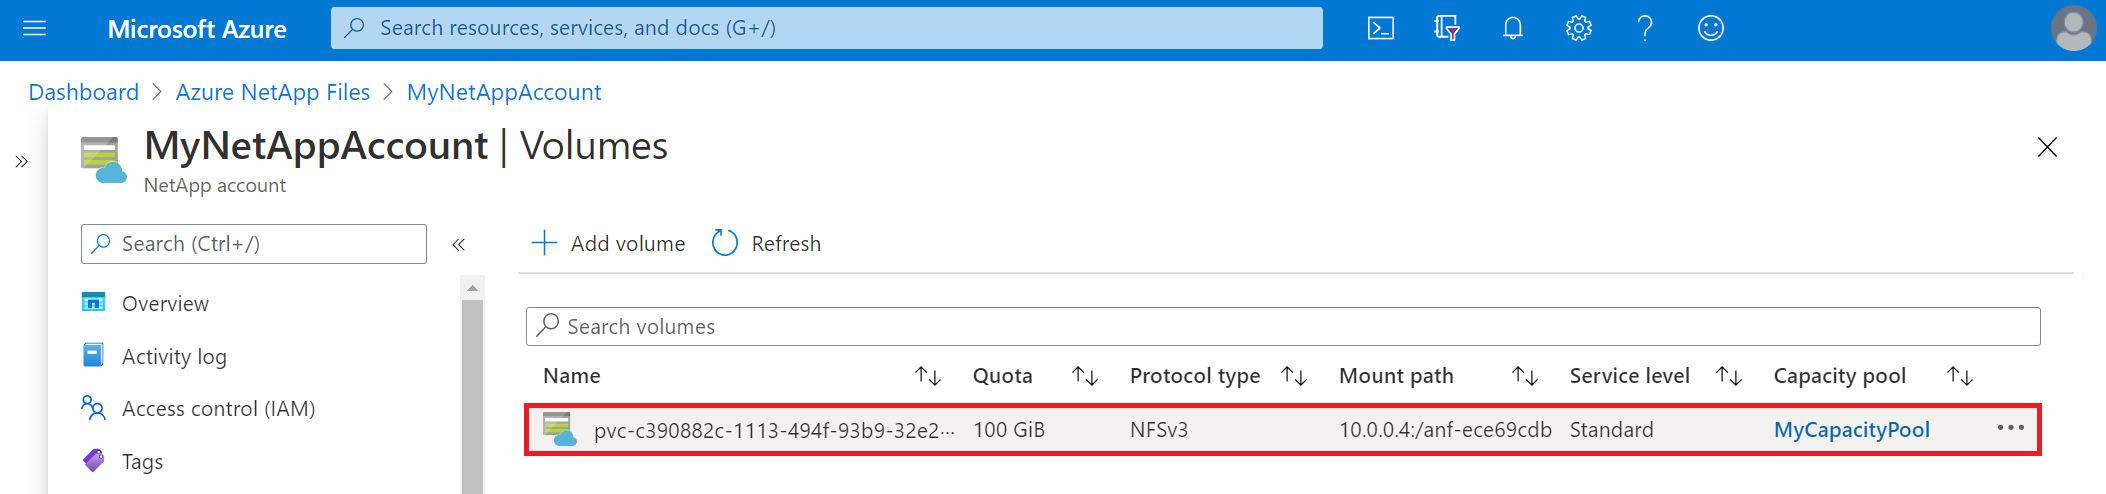
kubectl apply -f anf_pvc.yamlVerify that Trident has dynamically provisioned an Azure NetApp Files volume. From within the Azure portal you should see that a new Azure NetApp Files volume has been created.
Create a Kubernetes deployment that references our persistent volume claim (PVC) 🔗
Instruct Kubernetes to deployment a simple nginx web server
kubectl apply -f nginx_deployment.yamlInstruct Kubernetes to give our nginx deployment a public IP address
kubectl expose deployment nginx-anf-trident --port=80 --type=LoadBalancer
Notice that only after you ‘kubectl expose’ does our deployment get a public IP address as shown above in the ‘EXTERNAL-IP’ column.
Get your nginx pod name (it should start with ’nginx-anf-trident’)
kubectl get pods
Assign your pod name to an environment variable to save some key strokes
pod=<paste your pod name from step 3 above here>Set permissions on our Azure NetApp Files volume. Our volume is nounted via NFSv3 to our pod’s ‘/usr/share/nginx/html’ directory. The permissions on this folder need to be ‘755’.
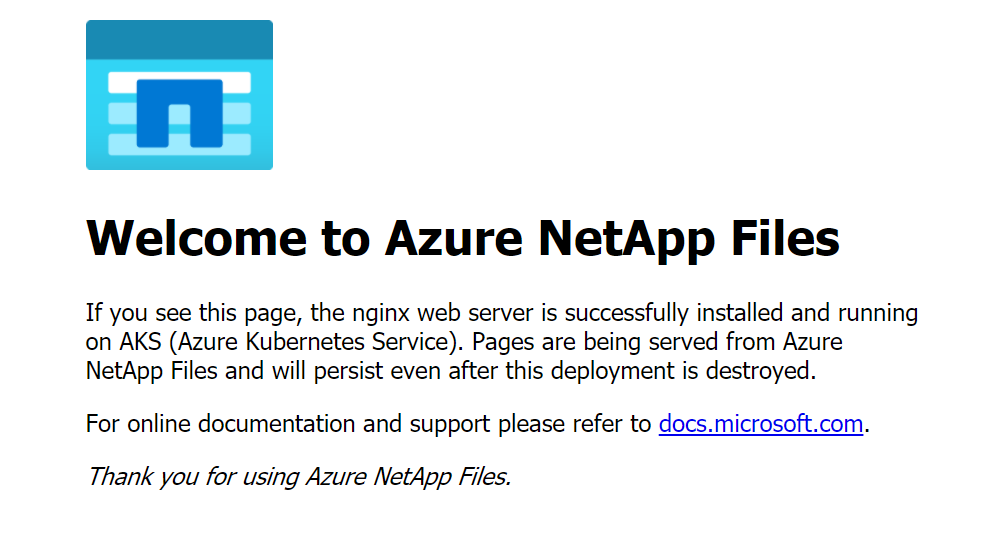
kubectl exec -it $pod -- chmod 755 /usr/share/nginx/htmlCopy our custom ‘index.html’ file to your pod’s ‘/usr/share/nginx/html’ directory.
kubectl cp ./index.html $pod:/usr/share/nginx/html/Point your web browser to your deployment’s ‘EXTERNAL-IP’ from step 2. You should be greeted with our custom index.html.
Destroy our Kubernetes deployment and re-deploy 🔗
Delete your Kubernetes service (external IP address)
kubectl delete svc nginx-anf-tridentDelete your Kubernetes nginx deployment
kubectl delete -f nginx_deployment.yamlInstruct Kubernetes to deploy your nginx web server again
kubectl apply -f nginx_deployment.yamlInstruct Kubernetes to expose your deployment, giving it a public IP address.
kubectl expose deployment nginx-anf-trident --port=80 --type=LoadBalancerGet your new public IP address
kubectl get svcPoint your browser to the public IP address and notice that your custom index.html has persisted! Magic.
Cleaning Up 🔗
Delete your Kubernetes service (external IP address)
kubectl delete svc nginx-anf-tridentDelete your Kubernetes nginx deployment
kubectl delete -f nginx_deployment.yamlDelete your Azure NetApp Files persistent volume claim (PVC)
WARNING: This command will instruct Trident to delete the Azure NetApp Files volume.
kubectl delete -f anf_pvc.yamlGo back to the Azure portal and delete your Azure NetApp Files capacity pool.