Hello and welcome to the first post in a three part series that will help you get up and running with the Azure REST API. More specifically I’ll show you how to use the Azure API to interact with your Azure NetApp Files resources.
Getting started with REST APIs can be a little tricky. There are several components to a REST API call. Combine that with the various types of authentication and things can get pretty overwhelming. Microsoft has chosen to use what is called ‘bearer token’ as the authentication method for their Azure Management API.
I’ll call this first part ‘bearer of good tokens’.
This ‘bearer token’ is unique to you and your Azure subscription. It needs to be passed as part of your REST API call in order to prove to Azure that you are authorized to interact with your Azure resources. This token should be treated as a very sensitive bit of information. Keep it in a secure place and don’t accidently commit it to a public code repository. (been there, done that!)
“This sounds exciting, how do I get my bear token!?” 🔗
Erm… that’s ‘bearer token’ and great question! Microsoft has made this quite easy and I have broken it down in to three easy steps:
- Create an Azure ‘service principal’
- Install and Configure Insomnia Core (REST API client)
- Issue a POST request to https://login.microsoftonline.com
Let’s dive in to each of these a little bit deeper…
1. Create an Azure ‘service principal’ 🔗
I think the easiest way to do this is to use the Azure CLI (az cli):
az ad sp create-for-rbac --name "AzureNetAppFilesSP"
If you are not familiar with the Azure CLI, go check out this getting started guide.
The output (in JSON) should look something like this:
{
 "appId": "11111111-1111-1111-1111-111111111111",
 "displayName": "AzureNetAppFilesSP",
 "name": "http://AzureNetAppFilesSP",
 "password": "22222222-2222-2222-2222-222222222222",
 "tenant": "33333333-3333-3333-3333-333333333333"
}
We’ll need some of this information a bit later.
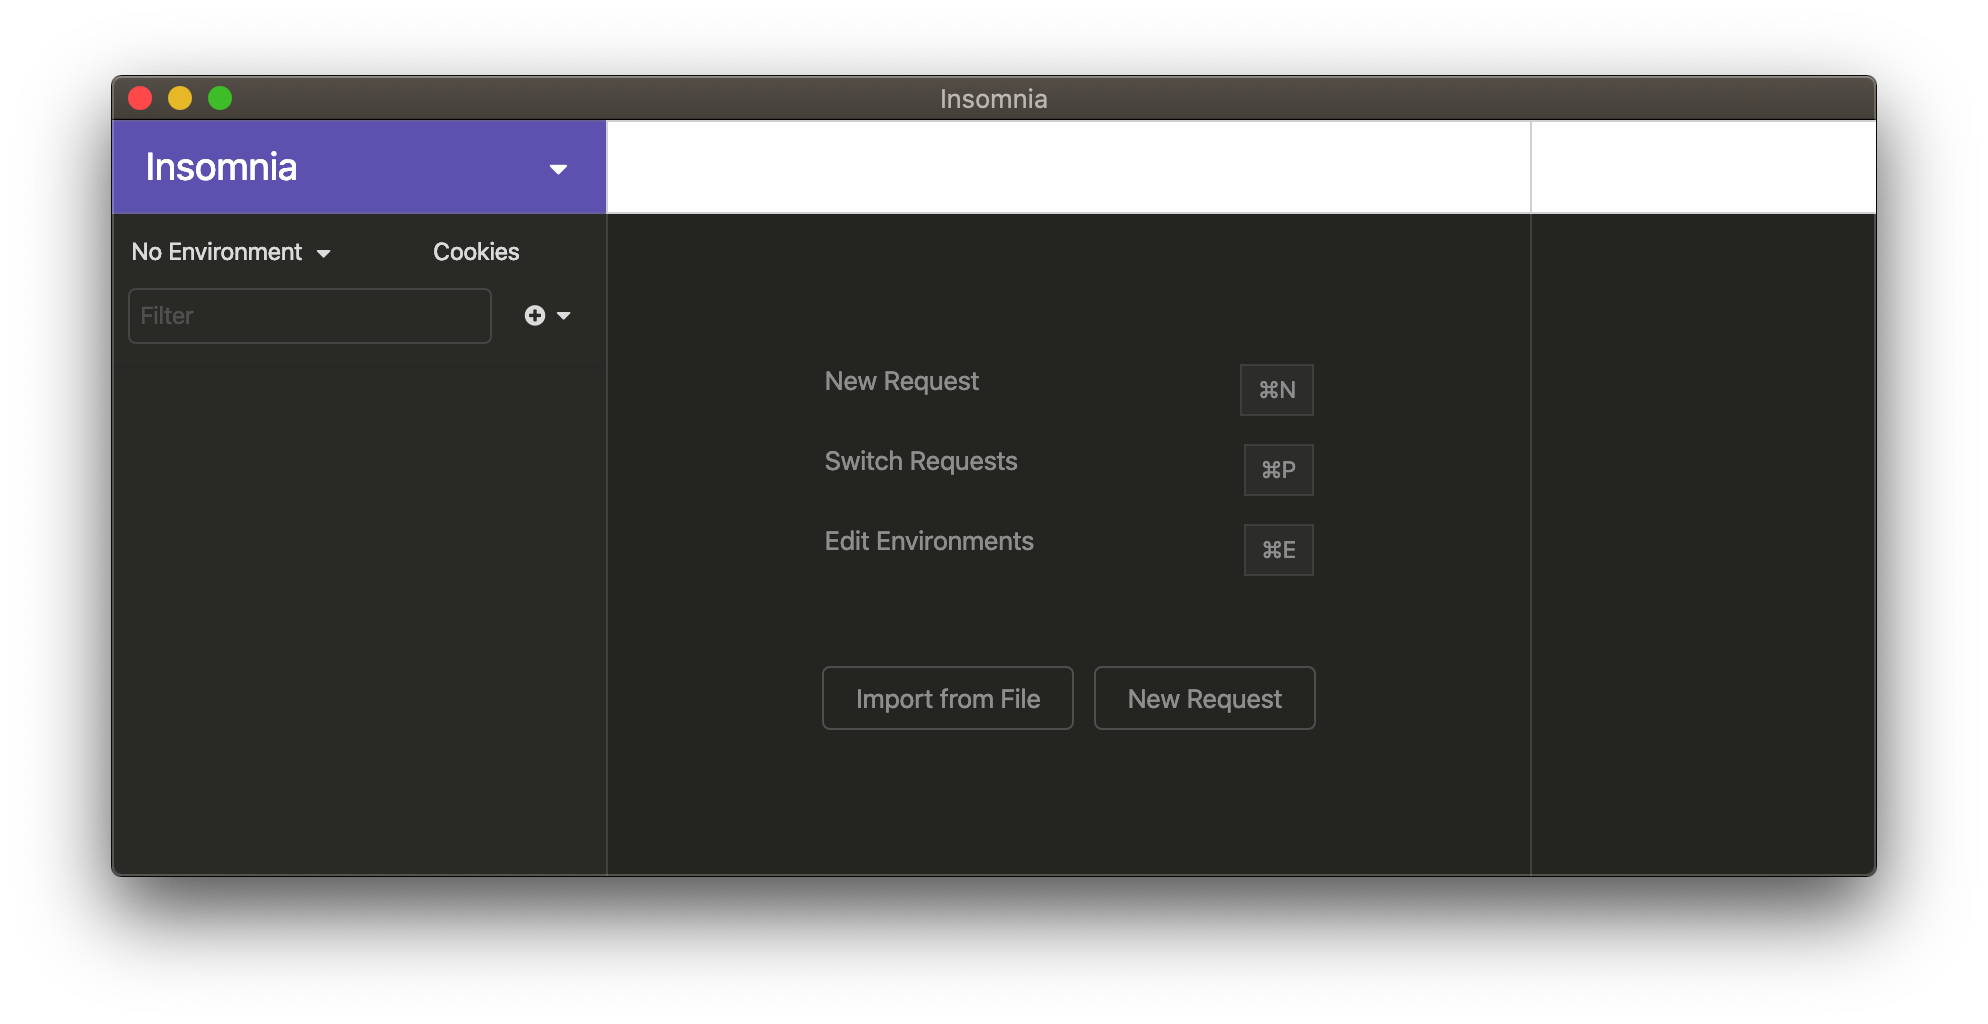
2. Install and Configure Insomnia 🔗
Go here and follow the instructions to install Insomnia Core. It should look something like this:
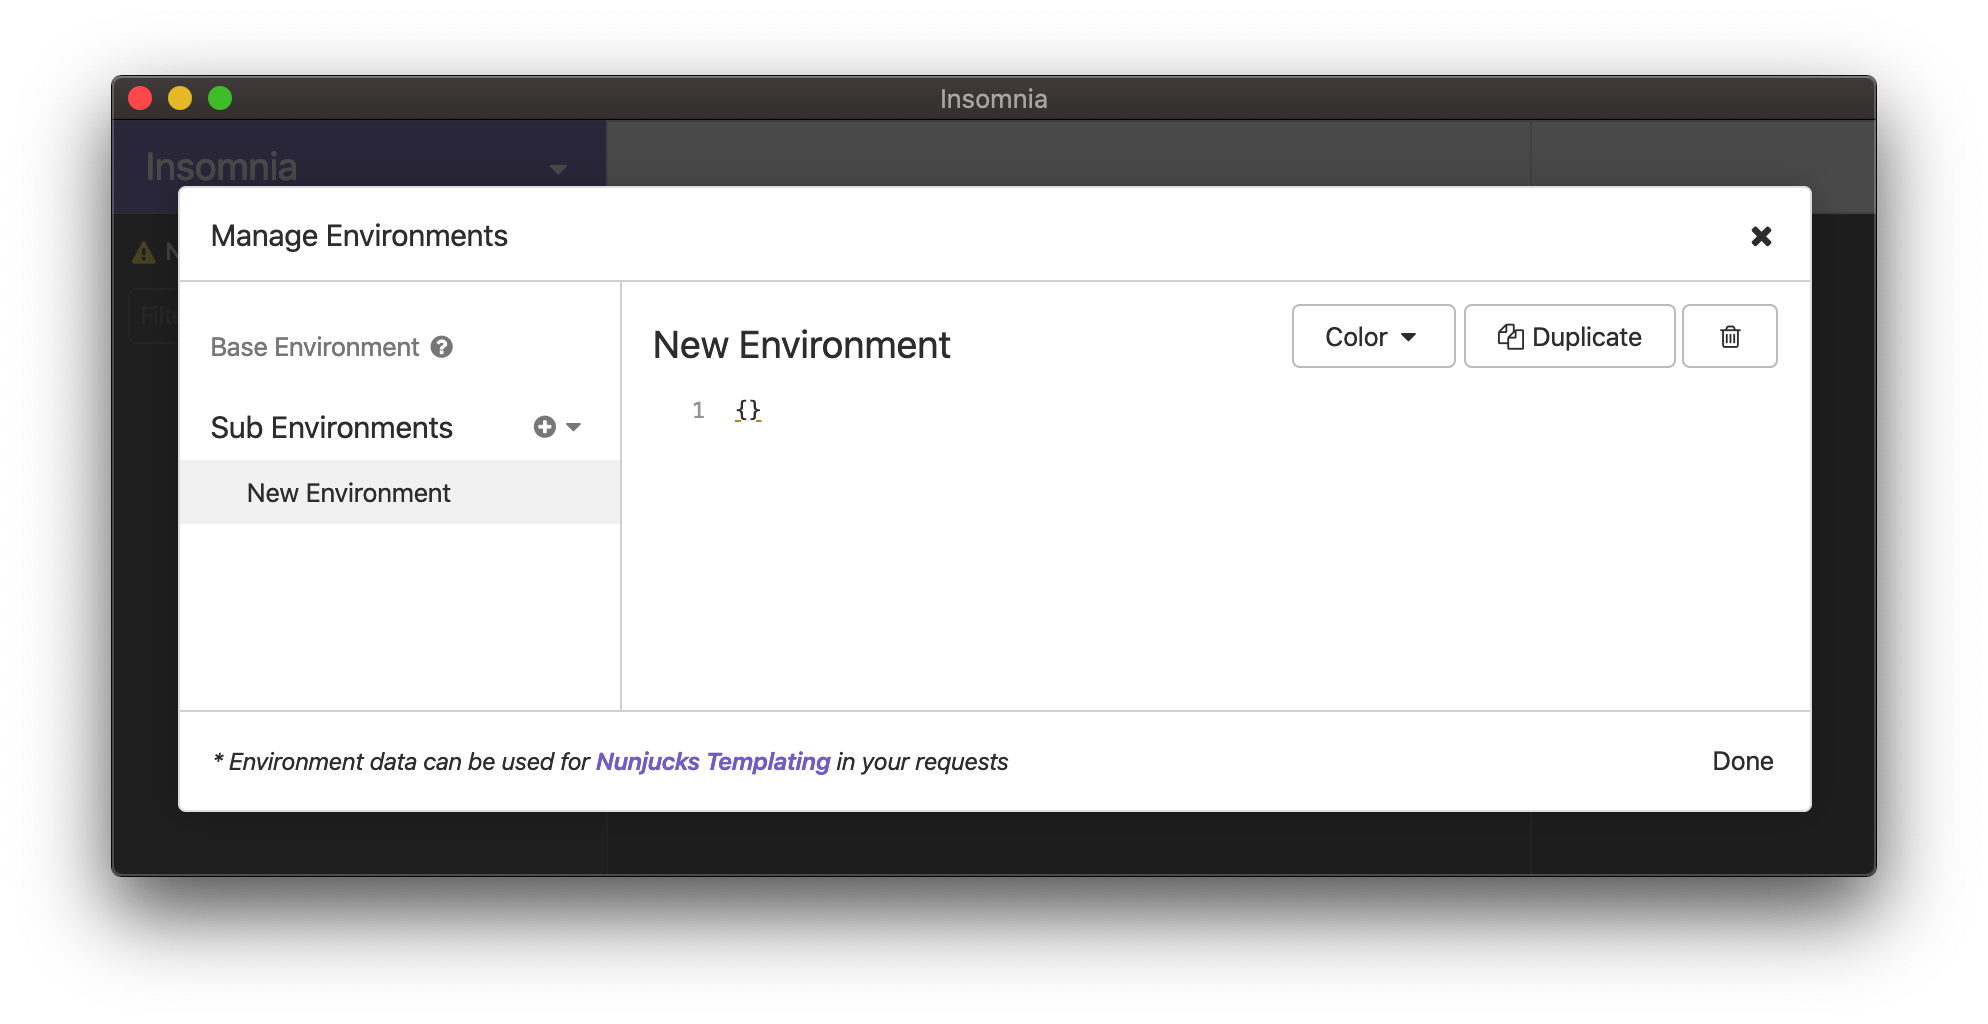
Now create a ‘Sub Environment’. The sub environment contains all of the specific variables that we need to interact with our Azure resources. You may have multiple sub environments if you will be interacting with multiple Azure subscriptions, for example.
Click the down arrow next to ‘No Environment’, select ‘Manage Environments’, click the + symbol next to ‘Sub Environments’, and select ‘Environment’. You are now presented with a screen and two curly braces: {}, this is where we can specify variables that are specific to our environment to be later referenced in your API calls. It should look like this:
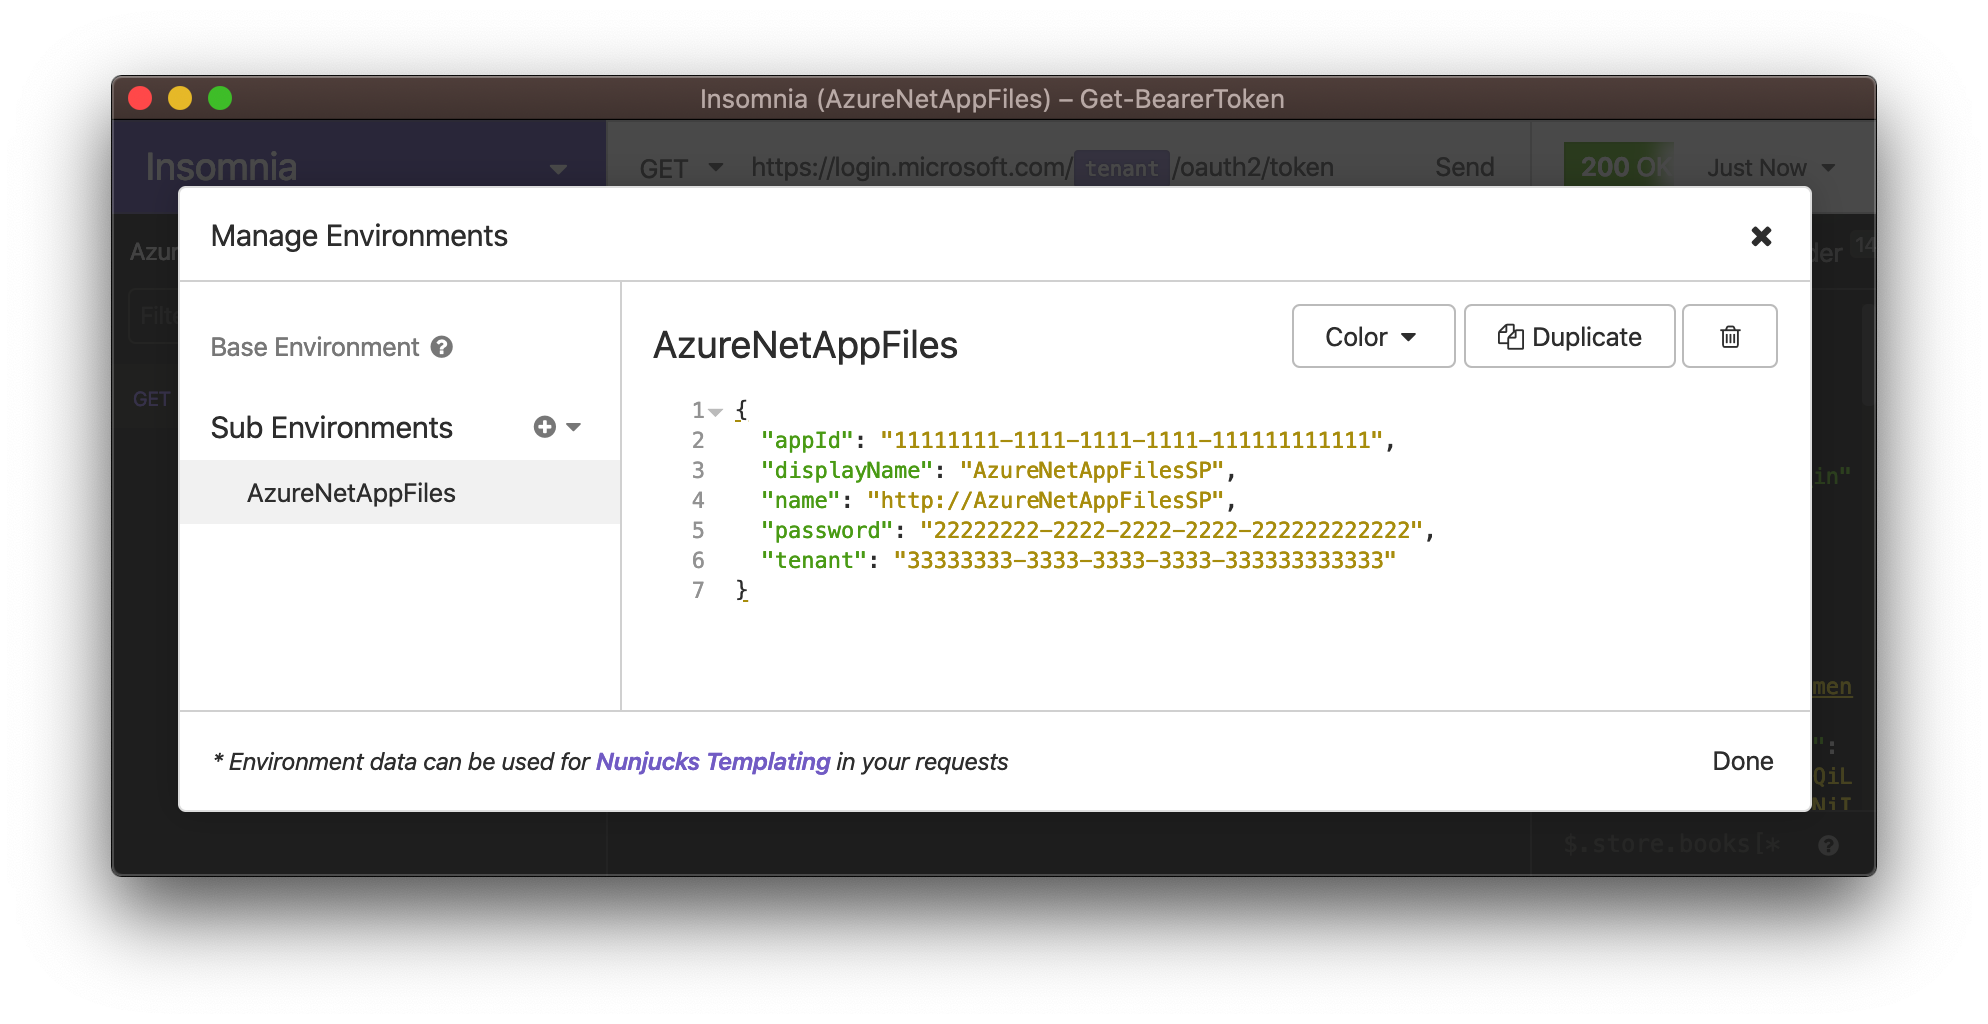
Rename your sub environment (I called mine ‘AzureNetAppFiles’) and replace the two curly braces with the output of your ‘az ad sp create-for-rbac’ command from step 1. This is what we have so far:
 Go ahead and click ‘Done’ in the bottom right hand corner. Back at the main screen, select your new sub environment from the drop down menu to activate it.
3. Issue a POST request to https://login.microsoftonline.com 🔗
Now that we have our sub environment created and variables defined, we can issue our POST API call to generate our bearer token.
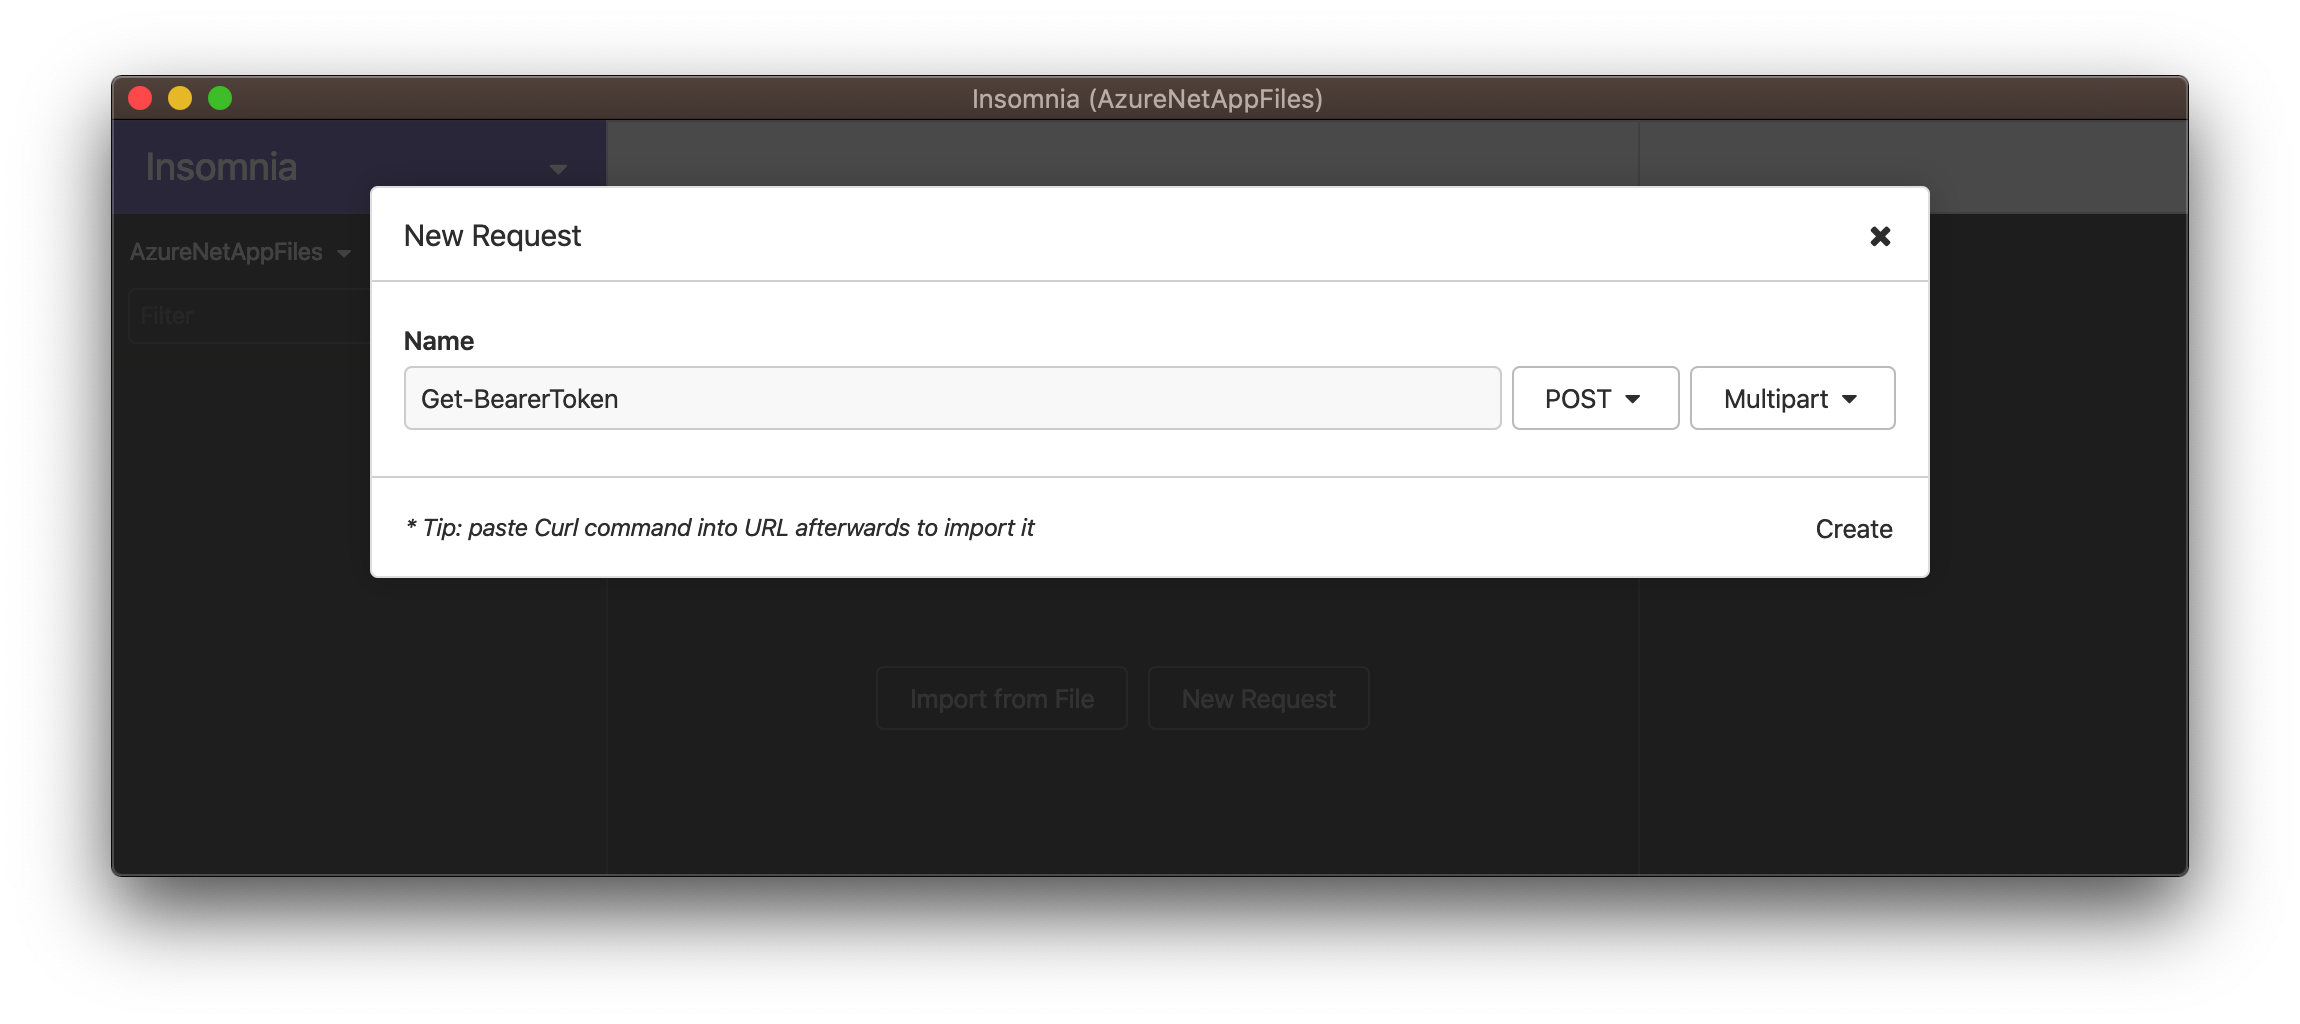
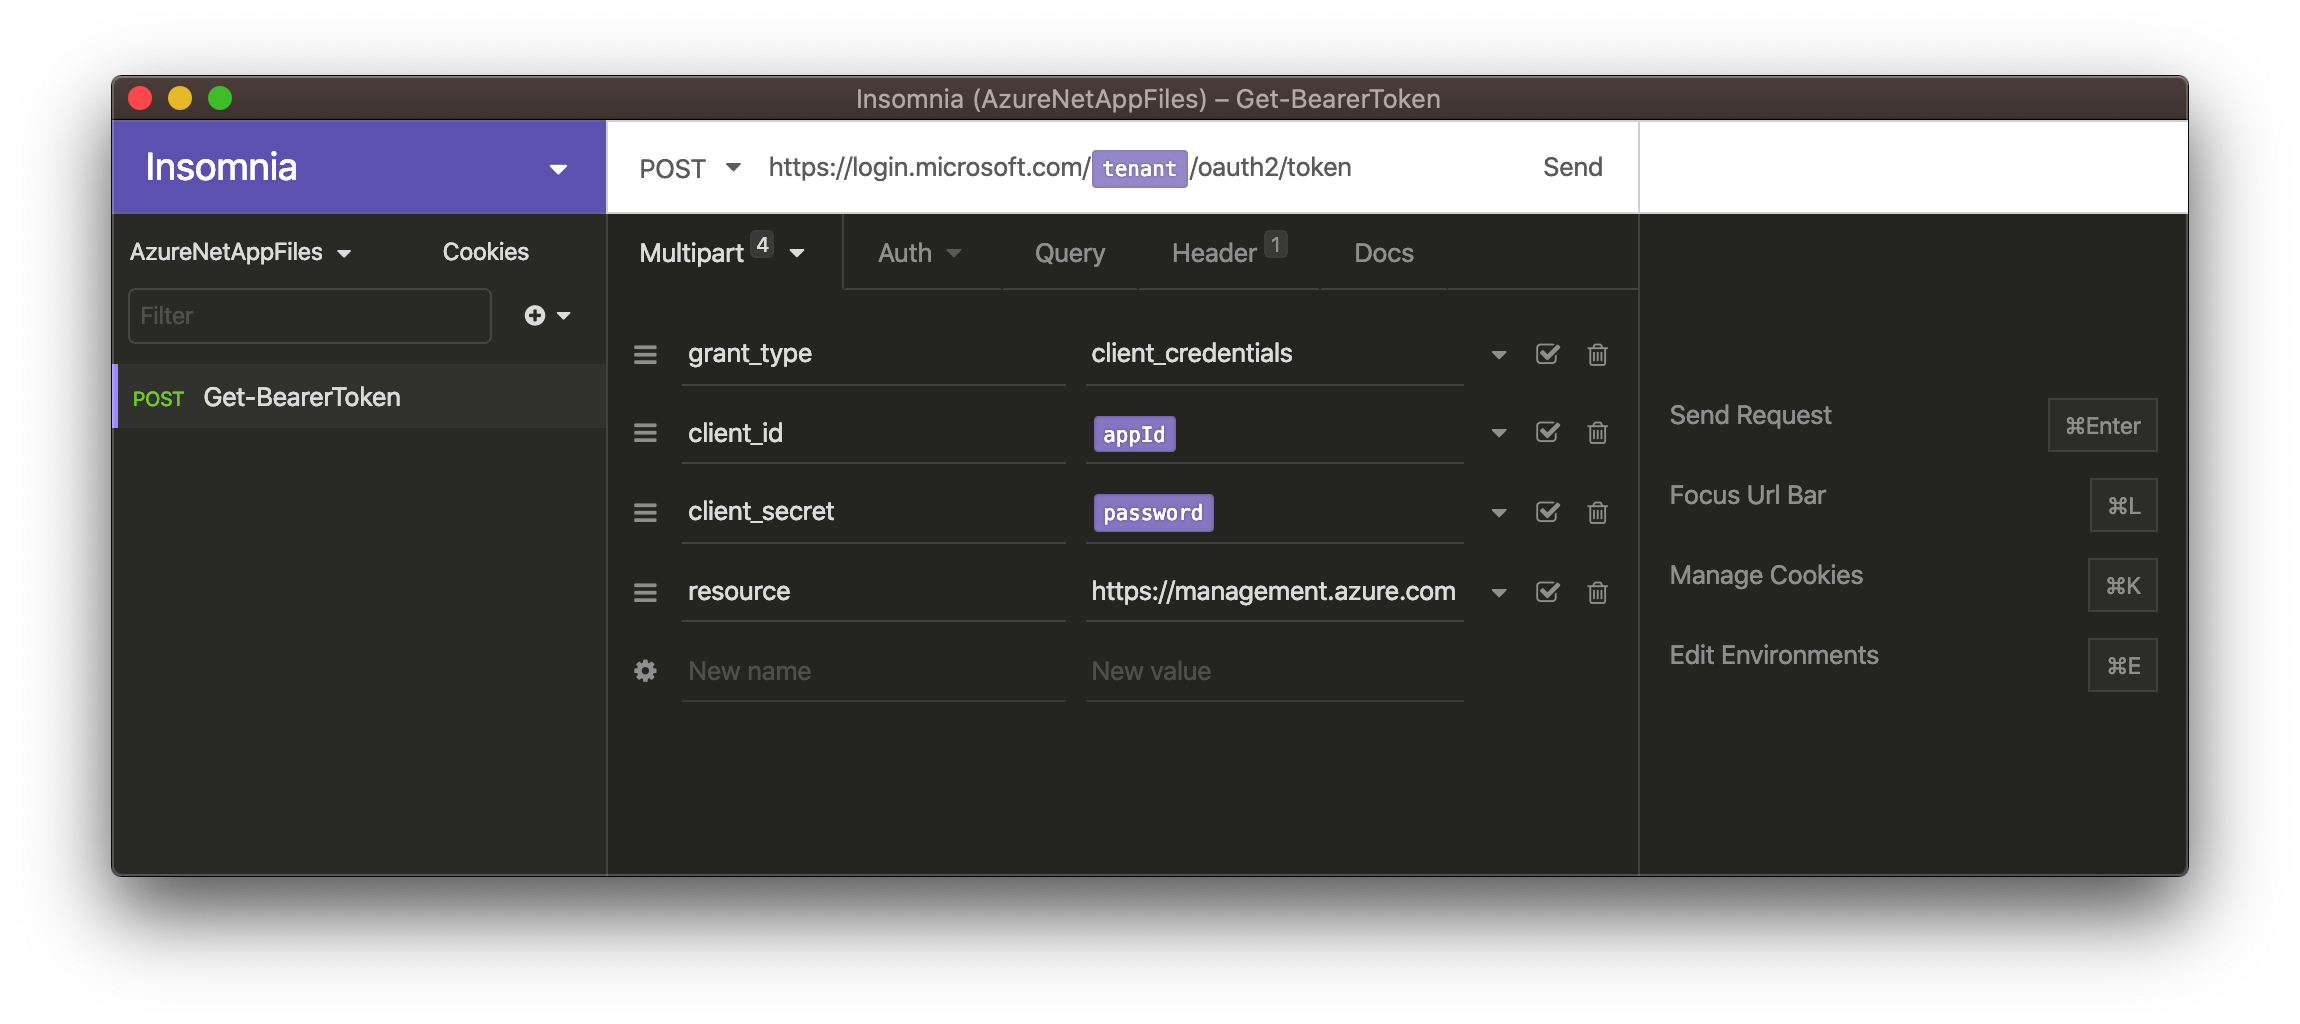
Go back to Insomnia and click ‘New Request’ from the main screen, name your request ‘Get-BearerToken’, make sure the dropdowns say ‘POST’ and ‘Multipart’ and then click ‘Create’.
At the top of the window you will see a text field to the right of the word ‘POST’. Paste the URL below in to that field.
https://login.microsoftonline.com/{{tenant}}/oauth2/token
Double curly braces are how we reference variables within Insomnia. You should see ‘{{subid}}’ turn in to a colored square if you have done everything correctly. When we send our request, the ‘subid’ variable gets replaced with our Azure subscription ID that we defined in our sub environment.
Now create the following four name/value pairs in the ‘Multipart’ tab:
| name | value |
|---|---|
| grant_type | client_credentials |
| client_id | {{appId}} |
| client_secret | {{password}} |
| resource | https://management.azure.com |
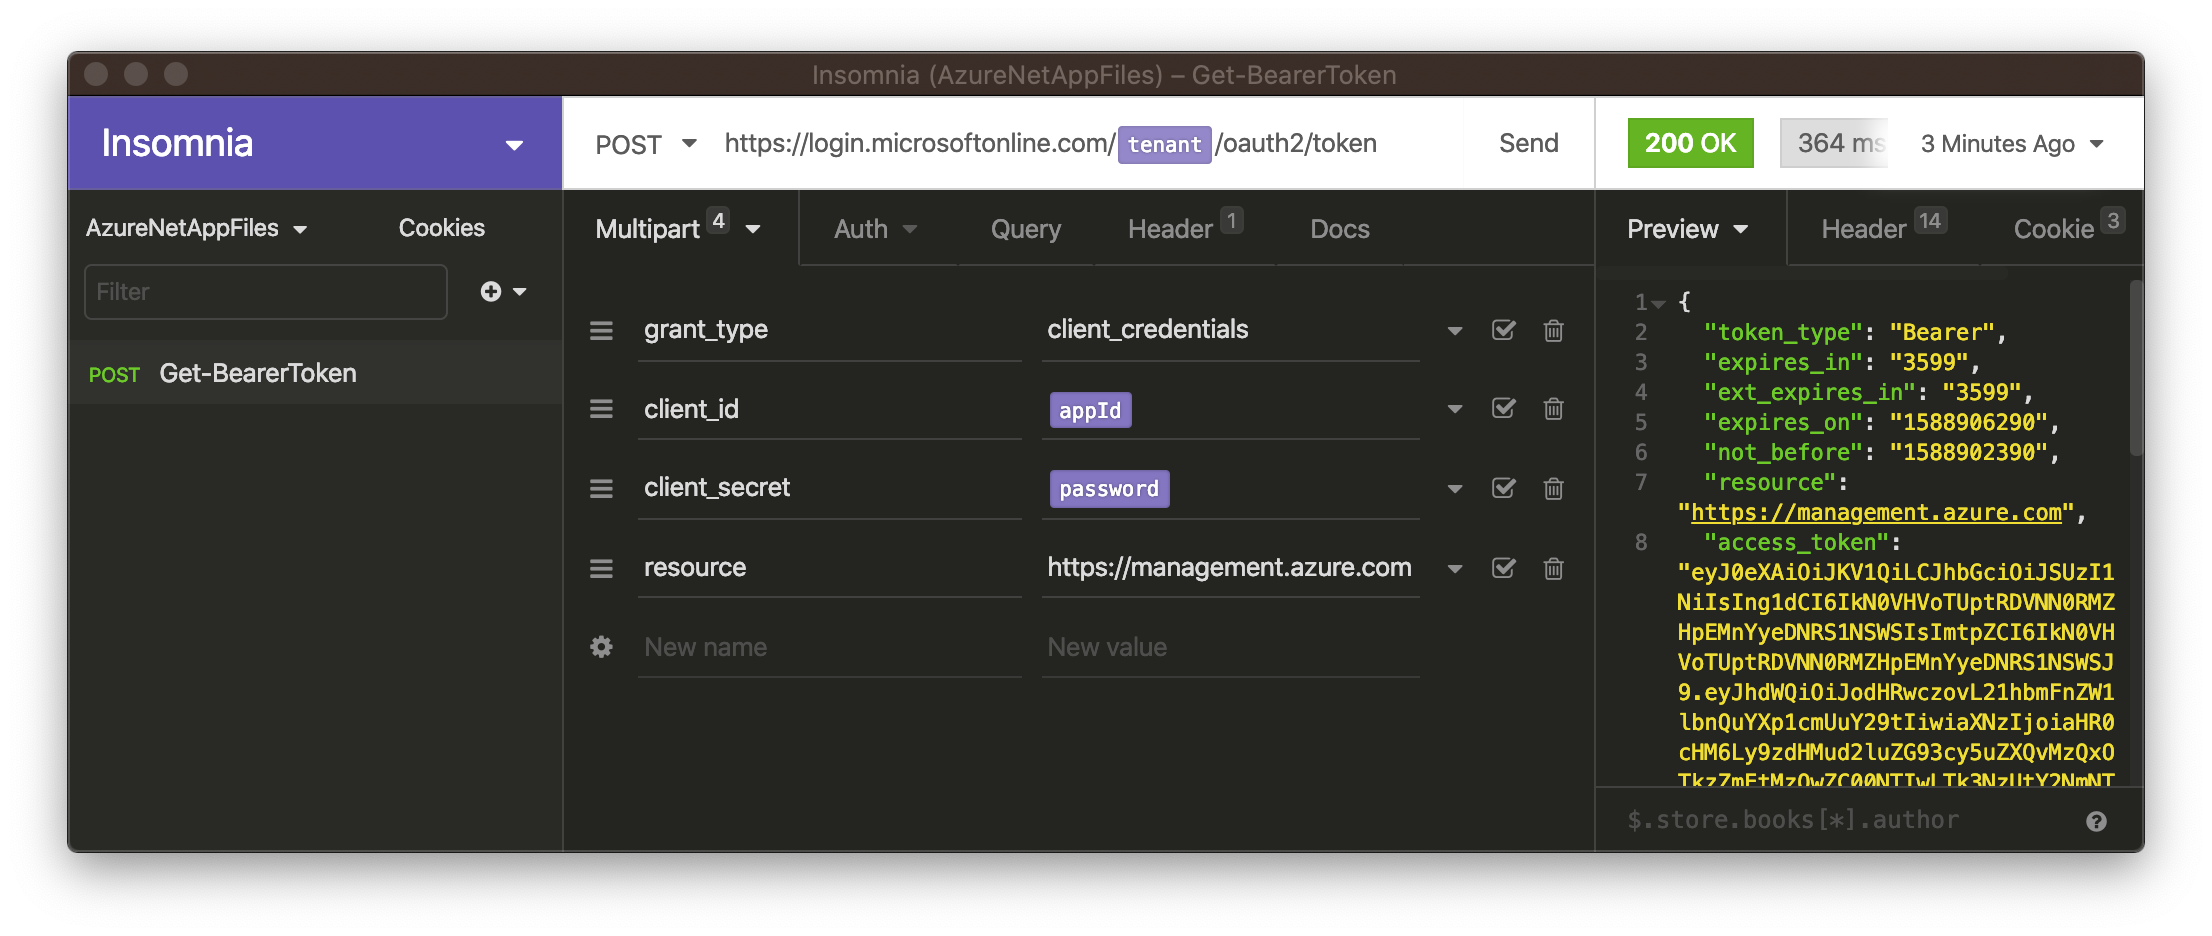
And finally, click the ‘Send’ button to get your bearer token. You should get a ‘200 OK’ response and the right hand pane will display the content of the response, which includes your bearer token.
Stay tuned for part two where I’ll show you how to use the Azure REST API to get information about your Azure NetApp Files resources.